Whether you’re building a high-end performance machine or a budget-friendly PC, we’ve got you covered.
Before we dive in, we should note that this guide only covers the actual PC.
Finding the right parts can be confusing – and expensive.

Gaming PCs can cost as little as $500, or as much as several thousand dollars to build.
In that case, refer to resources likePC Part PickerorNewb Computer Builds example buildsto find suitable replacements.
Tools
For the vast majority of your build, you’ll be using a No.
1 Phillips screwdriver for that.
Most CPU coolers come with thermal paste already applied, which means you won’t need any extra.
We’ve briefly explained some of the parts and terminology we’ll be using below.

Feel free to reference this section as you work on your build.
GPU:GPU stands for graphics processing unit; another name for a graphics card.
This will handle displaying images on your PC.

The more elaborate and complex these images are, the more power you’ll need from your graphics card.
The two big names in the graphics card game are Nvidia and AMD.
For your PC, you’ll choose a CPU from either Intel or AMD.

This provides much faster access to saving and accessing data.
M.2 SSD:An M.2 SSD is a small stick that provides your PC with storage space.
Cooling system:The cooling system is used to protect the CPU from overheating.
PSU:The PSU (or power supply) supplies your PC and its various components with power.
OS:OS stands for operating system.
Our general rule of thumb is to install as many parts as possible before screwing it into your case.
just pay close attention to the following instructions before installing your components.
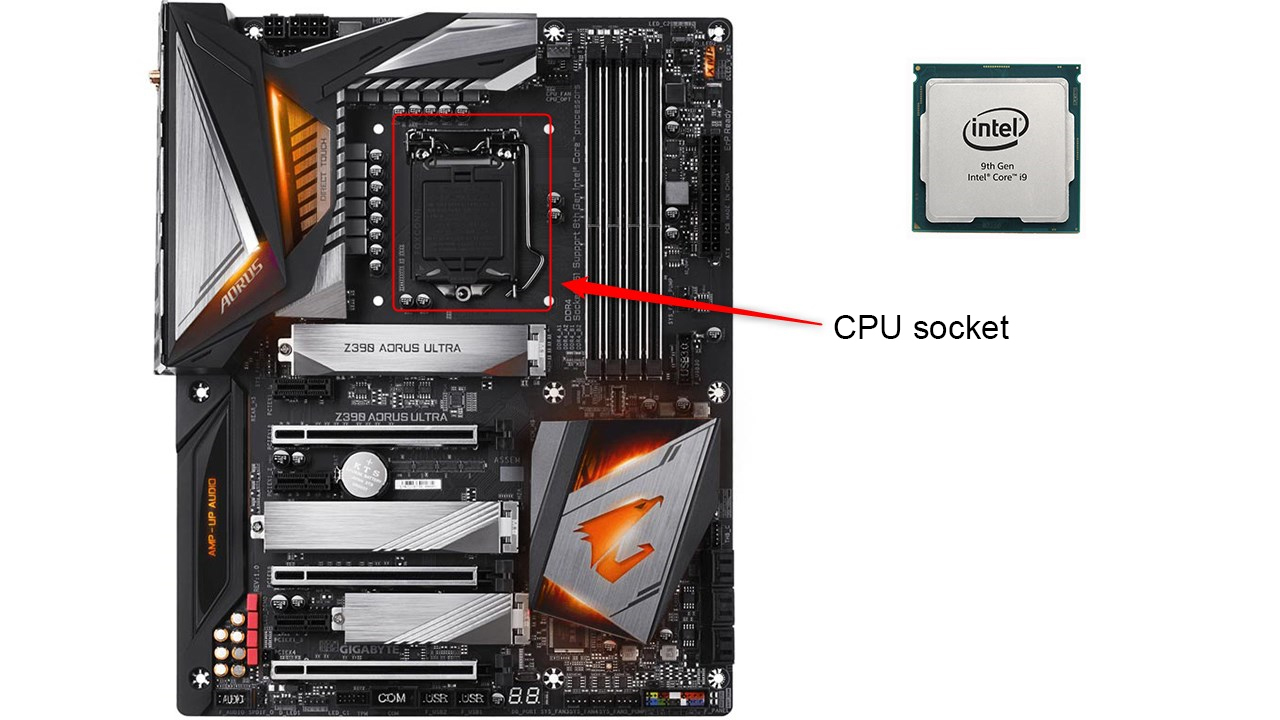
Take your motherboard out of its packaging and then place it on a flat surface.
At this point, you’re ready to start.
All you oughta do is gently push down on the tray’s metal arm and pull it out.
Your CPU should have some small half-circle indents in its board.
Once you’ve figured out how to place your CPU into its socket, do so gently.

Your motherboard may have protective thermal guards on your M.2 slots, so remove those first.
Placing your RAM apart like this will help you get the most out of your CPU.
Inserting the RAM requires more force, but double-check you start small and then ramp up your pressure gradually.

When you hear a click, your RAM is in its slot.
This should cause the plastic clips to flip up, gripping your RAM.
If you notice your clips haven’t flipped up, then your RAM may not be seated properly.

There should be about a dozen holes for the standoffs to fit into.
Refer to your case’s manual if you’re having trouble finding them.
Once the standoffs are screwed in, you’re ready to insert your motherboard.
Don’t forget that you don’t want to screw anything too tightly.
Just turn your screwdriver until everything is securely tightened, and then you’re ready to move on.
You’ll want to refer to your specific case’s manual for this, but it’s pretty straightforward.
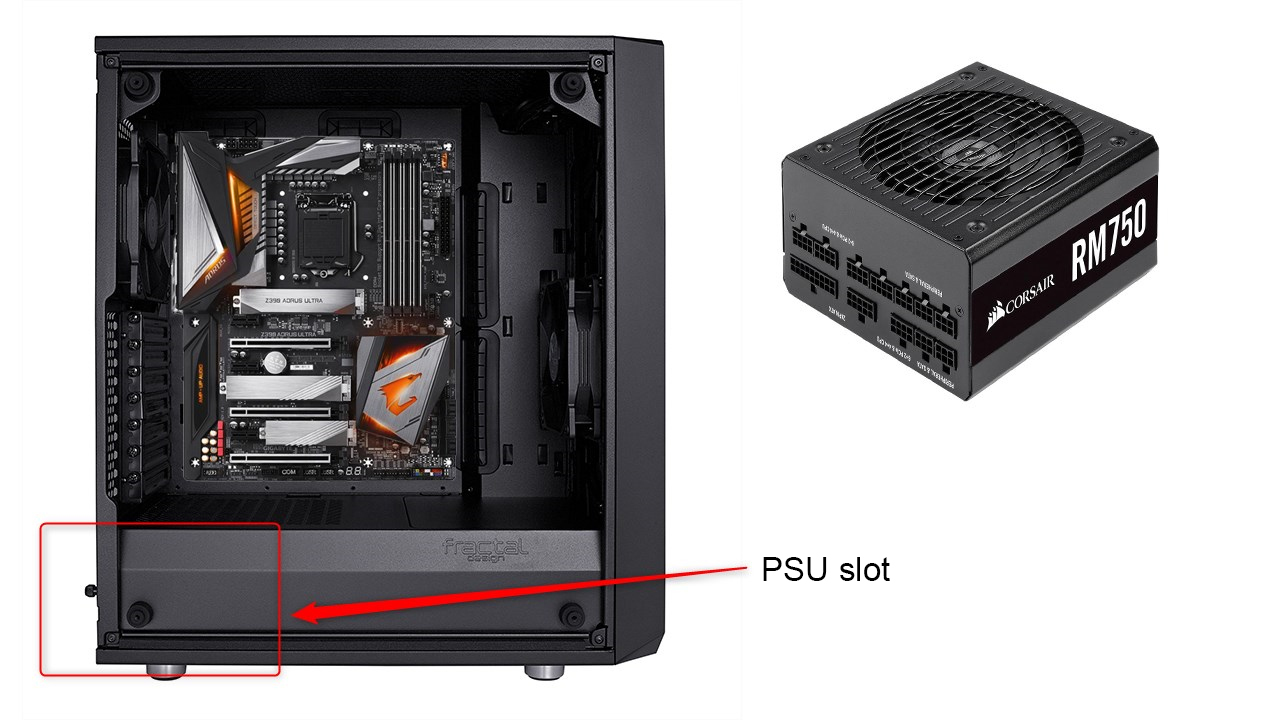
First, we took our case’s mounting bracket and screwed it onto the back of our power supply.
You’ll notice your power supply also sports a fan, which is used to circulate air.
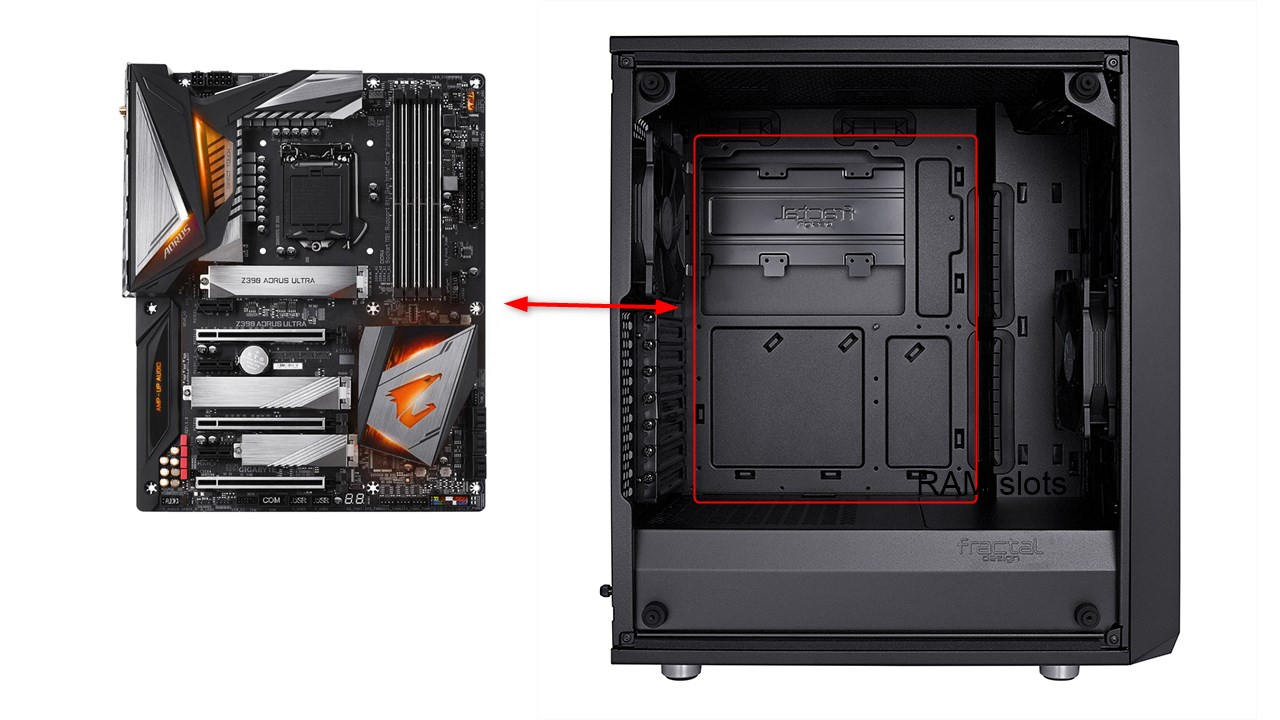
Your case should have a specific bay area dedicated to holding these kinds of drives.
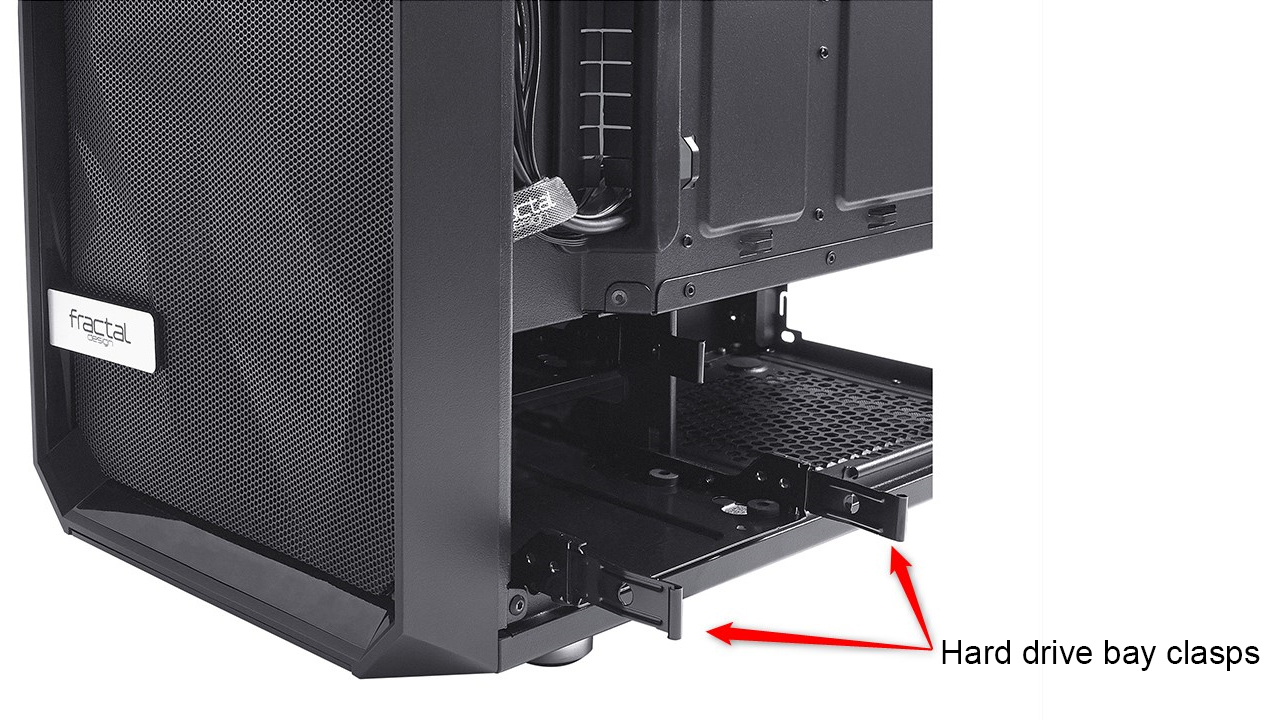
Locate this area, then look for two metal clasps on the left and right side of each bay.
Squeeze these clasps and then pull the bay out.
This part requires some patience, as your case cables are extremely tiny and can be difficult to orient.
You’ll want to reference both your case and motherboard manuals during this step.
This makes this step much easier.
Before you do this, however, there are a few other steps.
Of course, you’ll need to figure out where you want to install it.
Once you’re done this, you’re ready to attach the pump.
First, you’ll want to apply some thermal paste.
You’ll want to apply a pea-sized glob of thermal paste into the center of your CPU.
During this step, always go smaller than bigger.
Once applied, you might press the cooler into its position on the CPU and thermal paste.
This’ll create some room for air circulation and accessing your components if you ever want to upgrade later.
It’s located on the back of the motherboard tray.
We were able to slide all of our cables into this space and keep it all fastened up nicely.
Just confirm you don’t over-tighten your zip ties as doing so could damage your cables.
The graphics card is easy to install.
At this point, you gotta plug your graphics card into your power supply to give it power.
Here are a few things it’s possible for you to do to troubleshoot your powerless PC.
Is the power supply plugged into an outlet?
This is a simple fix.
Just plug your PC into an outlet, and you should be good to go.
Is the power supply’s switch turned on?
double-check you’ve flipped your PSU’s switch into the ‘On’ position before powering on.
This is an easily overlooked issue with a solution that’s just as easy.
Are your power supply cables seated in the motherboard properly?
This is the next thing you should double-check.
Reconnecting the cables could be what you better finally deliver power to your PC.
Are your case’s cables plugged into your motherboard properly?
Are your parts installed correctly?
This is the last thing to check as it can be the most time-consuming.
If all this fails, then your components may be defective.
Unfortunately, this can happen.
Sometimes when building a PC, you realize that one of your components isn’t working correctly.
It just might take a little longer to enjoy your brand-new gaming computer.
More Tech Picks From GameSpot
Got a news tip or want to contact us directly?
